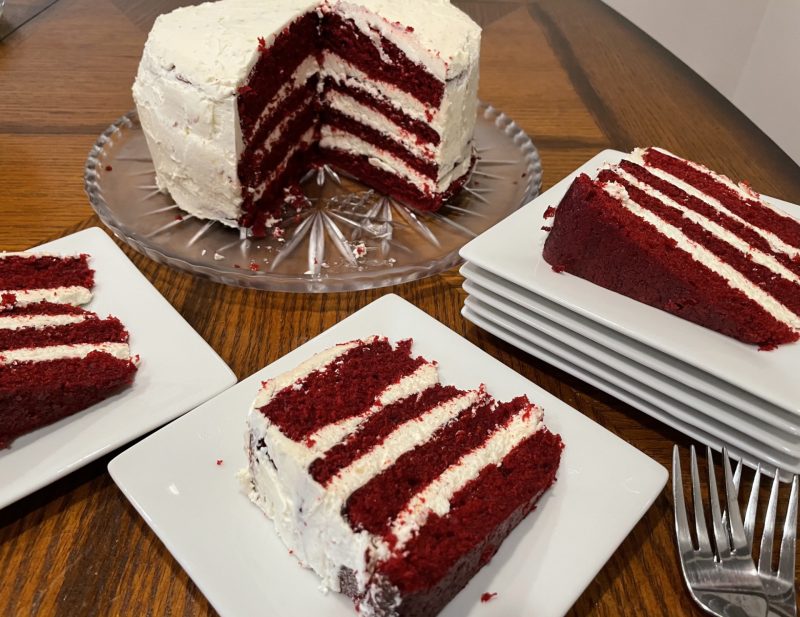
In the early 2000s you couldn’t cross the street without seeing something related to red velvet. I’ve seen red velvet coffee and I’m sure someone made red velvet toothpaste or dental floss or laundry detergent. While it felt really overdone and excessive at the time, red velvet is a classic flavor that remains a go-to recipe. My partner, Scott, has fond memories of red velvet on his birthday. While I am a strong believer that red velvet warrants a cream cheese frosting, he believes the only way to go is with the Ermine Frosting (made with a pasty custard base, whipped into butter) and since I always make this on his birthday, he gets the frosting he wants.
Cake Ingredients
Serves 8-12
- 2 ½ cup all-purpose flour
- 3 teaspoons baking powder
- 1 teaspoon salt
- 1 1/2 cup granulated sugar
- 1 teaspoon baking soda
- 2 eggs
- 2 tablespoons cocoa powder
- 2 teaspoon vanilla extract
- 1 teaspoon red wine vinegar
- 1 1/2 cup vegetable oil
- 1 cup buttermilk
- 4 tablespoons red food coloring
Frosting Recipe: Below
Cake Instructions
Preheat oven to 350°
Butter 2 8-in cake pans, line with equally sized, round parchment paper and coat with butter. Sprinkle in a light layer of cocoa powder and lightly tap cake tins, upside down, over the sink to remove excess cocoa powder.
Sift together dry ingredients in a bowl.
In another bowl, mix together egg, vinegar, oil, buttermilk, vanilla, and food coloring. Fold into dry ingredients and mix thoroughly, but not excessively (too much mixing results in a bready cake).
Divide equally between the two prepared cake tins.
Bake for 35-40 minutes, or until a cake tester (such as a toothpick) comes out with just 1-2 moist crumbs. Rest in the pans for 30 minutes, then flip out on a wire rack until completely cooled before frosting.
Frosting Ingredients
- 5 tablespoons all-purpose flour
- 1 cup whole milk
- 1 1/2 cup granulated sugar
- 2 teaspoon vanilla extract
- Pinch of salt
- 1 1/2 cup unsalted butter, softened
Frosting Instructions
Over medium heat, whisk flour and milk in a small saucepan and heat to a simmer, stirring frequently until it becomes very thick and almost puddinglike. Add sugar and continue to mix until dissolved.
Remove from heat, whisk in vanilla and salt. Pour into a bowl to allow it to cool; place a layer of plastic wrap directly on the surface before chilling completely in the refrigerator for 1 hour or up to overnight.
In a stand mixer (or hand mixer), cream the butter until light and fluffy, occasionally scraping down the sides (approximately 5 minutes). Gradually add in the cooled flour mixture until it becomes fluffy and the texture of a stiff whipped cream.
Assembly Instructions
To assemble, take each cooled cake and slice in half, horizontally.
Take one halved slice and place on a cake stand, sliced side down, and place approximately 3/4 cup of frosting on top (I use a little less than 2 scoops from a standard ice cream scoop for evenness) and spread out with an offset spatula. Push lightly to the edges. Next, place another layer of the cake on top, spread with an additional layer of 3/4 cup frosting. Repeat with the third layer of cake and third layer of frosting before adding the final, fourth layer of cake.
You’ll want the fourth layer of the cake to be dome side up, mostly because it is less crumbly, which will result in a cleaner look with fewer crumbs in the frosting. The domed layer may not be perfectly smooth and flat, but it’s okay if it looks rustic. Plop the rest of the frosting on top and gradually push out to the edges of the cake with an offset spatula. Once the top is covered with frosting and smooth and most of the extra frosting is in a large, heaping border at the edge, begin to push down the sides. It’s easier to push around the frosting on the sides (from the top).
Once the cake is frosted, place in the refrigerator to chill for 20 min. At this point, you can take the cake out and after warming up an offset spatula in warm water (and then drying), smooth out the surface. A hot, dry, offset spatula does wonders for a cake that might have lumpy, uneven frosting. Just be sure to make sure the spatula is dry and the frosting is cold for smoothest results.
Slice and serve!
Notes
- Baking is a very exact science, usually, and not often can you just take a recipe and halve it or double; however, this recipe is very scalable. Halve it and you can make approximately 12 cupcakes or double and you can make approximately 4 dozen cupcakes or a very large, layer cake. Cupcakes take about 18-24 min baking at 350.
- In our household there’s an ongoing debate about the temperature a cake should be served at. Most people prefer room temp, when the cake is light, and the frosting is ethereally fluffy. However, I’ve always liked my cake straight out of the refrigerator. It’s dense and I love the texture of firm frosting. Neither serving temperature is wrong.
- Frosting cakes is hard—at least for me. Once you see the layers of vibrant red and crisp white in slice form it won’t matter if the exterior frosting is imperfect.
- This cake is best the day it’s baked and assembled, although will hold, tightly covered, for 2-3 days.


